

Currently, my sourdough starter and I are in a casual relationship. Nothing too serious. Mostly long distance – it stays in the fridge, and I pull it out every couple of weeks when I want to make bread or pizza. I feed it once, and wait until it’s ready to make some magic. Then I usually neglect it for another day or two before remembering it’s on the counter and feeding it once more before sticking it back in the fridge.
It sounds a little one-sided but it’s working for us. When I made my first starter last year, feeding it once or twice a day took up a lot of brain space that I just don’t have to offer at the moment. But I love having it around, to make Country Bread or this incredibly bubbly and chewy pizza dough.
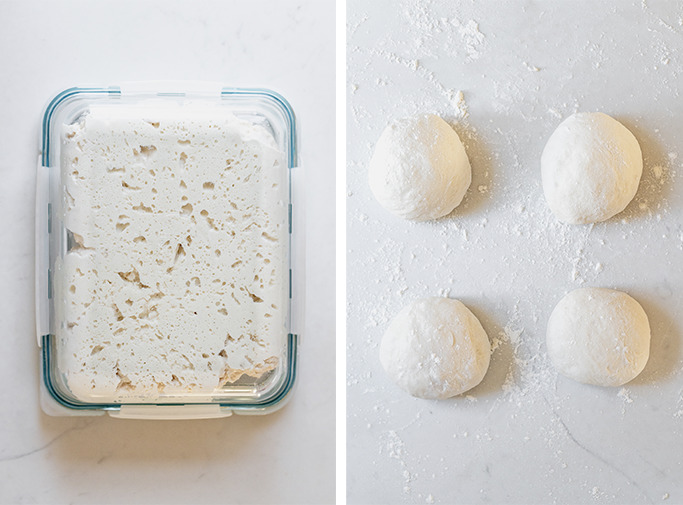
I know the “72 hour” in the title might scare away some, but trust me when I say – the actual prep takes 5 minutes, then you let the dough sit in the fridge for days and the fermentation does all the work. It’s magical! Look at all of the bubbles!
It’s also a very low hydration dough, meaning it’s not very sticky and is easy to work with. Once you try it, you won’t go back.

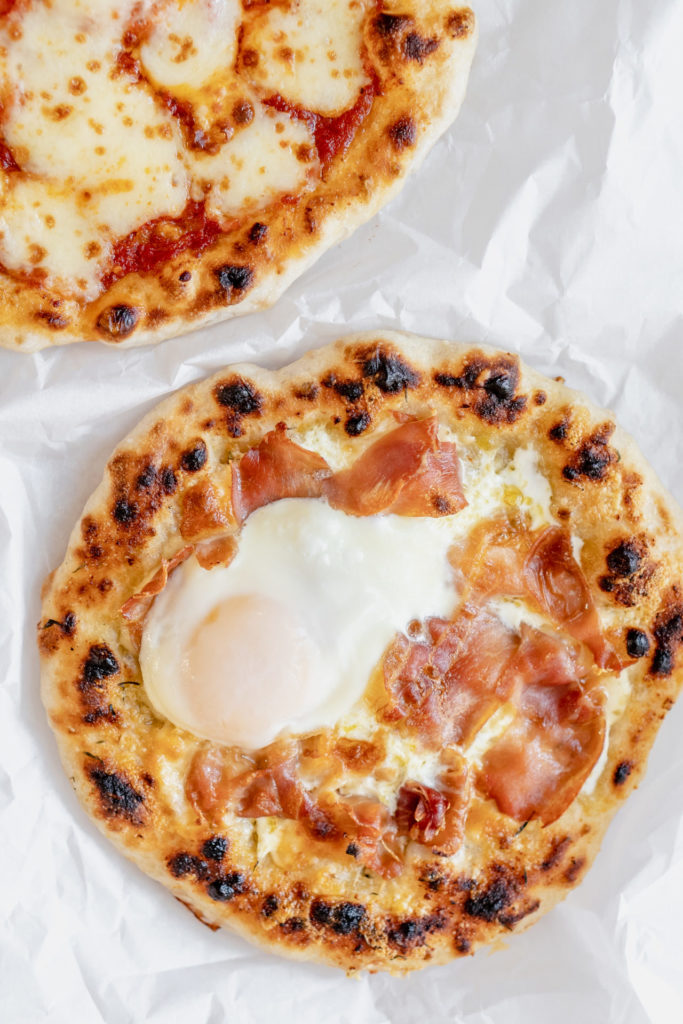
You can use it the same way you would use any other pizza dough – just let it rest on the counter for a few hours before baking. My fave way to make pizza at home (without a pizza oven) is the cast-iron method, which I learned from Josey Baker Bread. I’ve included the directions below. And if you need a recipe to use, my Feta Corn Pizza with Lime and Cilantro is a good one! Just saying.
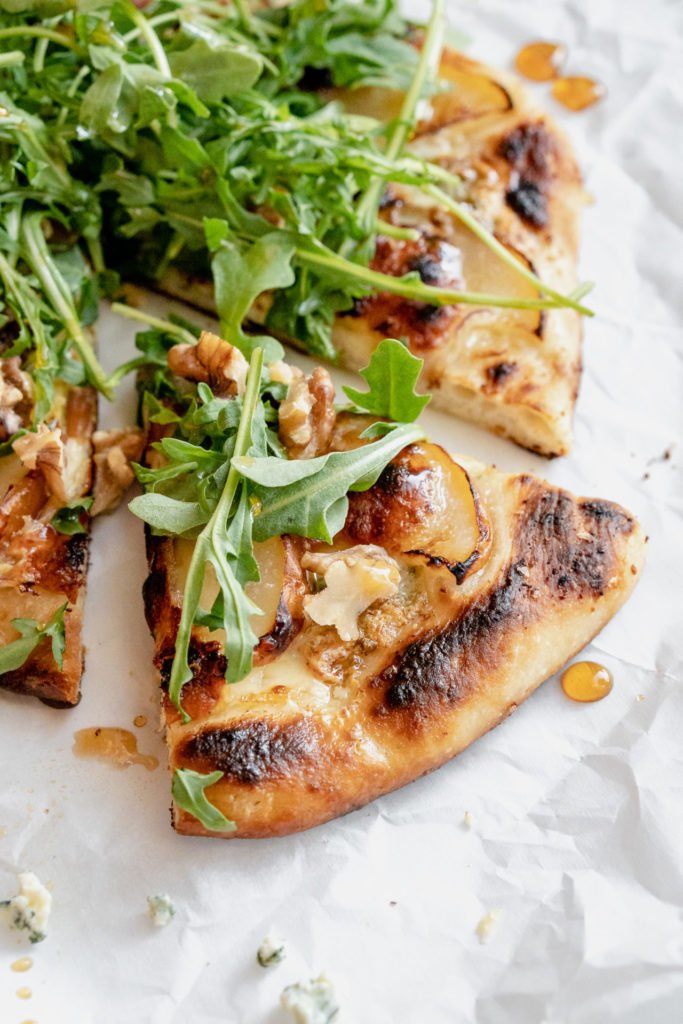
Recipe for this pear/blue cheese/toasted walnut/honey situation below coming soon! xo
72-Hour Sourdough Pizza Dough
Ingredients
- 100 g ripe sourdough starter
- 300 g cool, filtered water
- 12 g kosher salt
- 500 g bread flour
Instructions
Three days before you want to make pizza
- Combine the ingredients in a medium bowl and knead for two minutes, until there is no dry flour left.
- Place the dough in a lidded glass bowl or tupperware and place in the fridge for 48-72 hours. The longer it ferments, the more bubbly it will become.
~4 hours before you want to make pizza
- Remove the dough from the fridge and divide into 4 equal pieces, about 212g/7.5oz each.
- Lightly flour your work surface, then shape the pieces into tight rounds using a bench knife. Lightly flour the tops of the dough balls and cover with a tea towel. Let rest about 4 hours, until ready to bake. Use as you would any other pizza dough.
Cast-iron pizza method
- Heat a cast-iron skillet 10" in diameter or larger over med/high heat. Place an oven rack in the top of the oven and turn on the broiler to 500'.
- Add a generous drizzle of olive oil to the heated cast-iron and swirl the pan to coat the bottom of the pan.
- Using your hands (not a rolling pin!) stretch out one ball of pizza dough to fit your pan – between 8-10" depending on the stretchiness of your dough and the size of your pan. Be careful not to press too much air out of the dough. Once the oil is hot, add the stretched dough to the skillet.
- Work quickly to assemble the pizza in the pan.
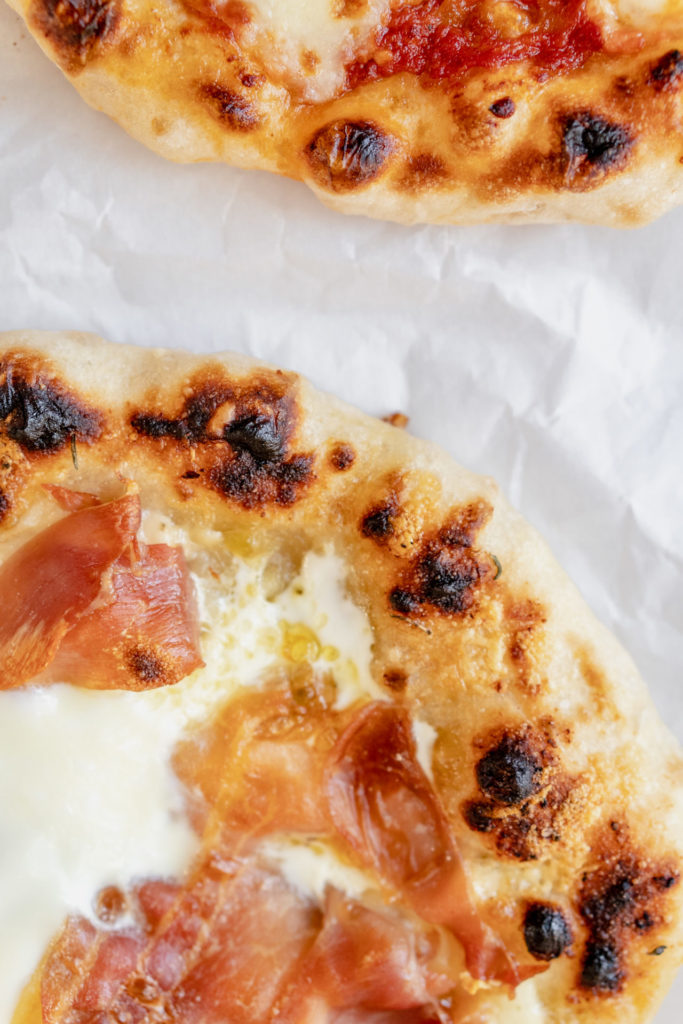
- Continue cooking until the bottom of the pizza is a dark golden – use a fork to peek underneath. Once the bottom of the pizza is sufficiently browned, carefully transfer the skillet to the top rack of the oven, under the broiler (don't forget oven mitts!)
- Watch pizza closely under broiler. Cook 2-3 minutes, until cheese and crust are golden and bubbly.
- Transfer pizza to a cooling rack, then repeat with remaining dough.
I have been working through many types of sourdough pizza recipes and can across this one. Looking at how easy it was I was skeptical at first. After trying it I was surprised!! I had a good chew to the crust and was also thin. My 10 year old daughter loved it! Defiantly making so I can have I the fridge all the time!
Thanks Robert! So happy to hear you enjoyed it. I love the ease of it as well, makes it really easy to have great dough on hand when you want it!
Curious how long you cook once toppings are added?
Hi Lizebeth! After I add the toppings to the pizza, I transfer the cast-iron pan to the top rack in my oven set to broil at 500′. The toppings cook very quickly under the broiler so watch it closely! It will only take 1-3 minutes for the cheese to get golden.
My starter was a little lazy and I only had one bubble so I was worried it wouldn’t work but I left in the oven on proof setting for a couple hours then turned off the oven and let it continue to sit in there. I didn’t par bake without toppings. I just used the King Arthur method and cooked it with toppings on a cast iron skillet for twenty minutes. Totally cooked through and lovely. Now that my starter is livelier it will probably be even better!
I am so behind on comments but I’m so glad to hear it worked well for you, Annie!
My dough as been in the fridge for 36 hours and it’s not bubbling. Can I add more starter or yeast to help it out? Or should I start over?
Hi Jenn! It’s hard to say without seeing it- but I would probably just start over if it doesn’t look like it’s fermenting at all. Maybe test your starter by seeing if a piece floats in a glass of water next time before mixing together the dough ingredients? I am sorry it didn’t work out!
Loved this recipe! Thank you. I’ve never used the cast iron skillet or tried such a long ferment. It was delicious and very easy. Thanks!
My first batch is fermenting now. Been a sourdough baker for 14 years and am excited for this. I can already tell be the dough that it’s a winner ????. I’m sure pretzels are right behind the pizza. Also, is a baking stone OK? I already bake my country boules on an upside-down cast iron covered Dutch oven, so the iron skillet idea intrigues me. I’ll post an update this weekend!
I am so behind on checking comments but I would love to hear how the pizza dough turned out for you! I’m sure the baking stone would work just fine- just sounds a little more dangerous if you’re still transferring from the stove top to the oven, haha!
Making this today and will post a review when it’s done!
I have a question:
How big should the lidded bowl be for fermentation?
Thank you!
For this size recipe, I just use the rectangular glass tupperware shown. I’d guess it holds around 8 cups? It’s actually not very large but the dough does not expand much while fermenting.
Very interested in your pear/blue cheese/toasted walnut/honey pizza recipe. I couldn’t find it anywhere. Thanks so much!
Oh man! I don’t think that one ever made it to the blog. But the idea is pretty simple! Olive oil base (no red sauce), cubed low-moisture mozzarella and blue cheese (not too heavy on the blue cheese), thinly sliced pears to bake, then topped with toasted walnuts (i find they get burnt if you cook them on the pizza), arugula dressed with olive oil and a touch of white balsamic, and a generous drizzle of hot honey! So good!